> ## Documentation Index
> Fetch the complete documentation index at: https://docs.conversion.ai/llms.txt
> Use this file to discover all available pages before exploring further.
# Creating a Blast
> Walk through the steps to create, configure, and send a blast email in Conversion.
To create a new blast, click **New blast** in the top right of the Blasts view.
## 1. Choose a starting point
You'll first be prompted to choose how to start building your email.
Start from a template your team has saved in Conversion. This is useful for emails you send regularly and want to keep consistent.
Start from one of Conversion's pre-designed email templates. These are fully designed, ready-to-customise templates built for common use cases.
Open a blank canvas in the email builder. Every element is yours to add from the ground up.
## 2. Build your email
Once you've chosen a starting point, you'll be taken into the [Email Builder](/product-docs/emails/email-builder/overview) to design your email.
## 3. Configure your blast settings
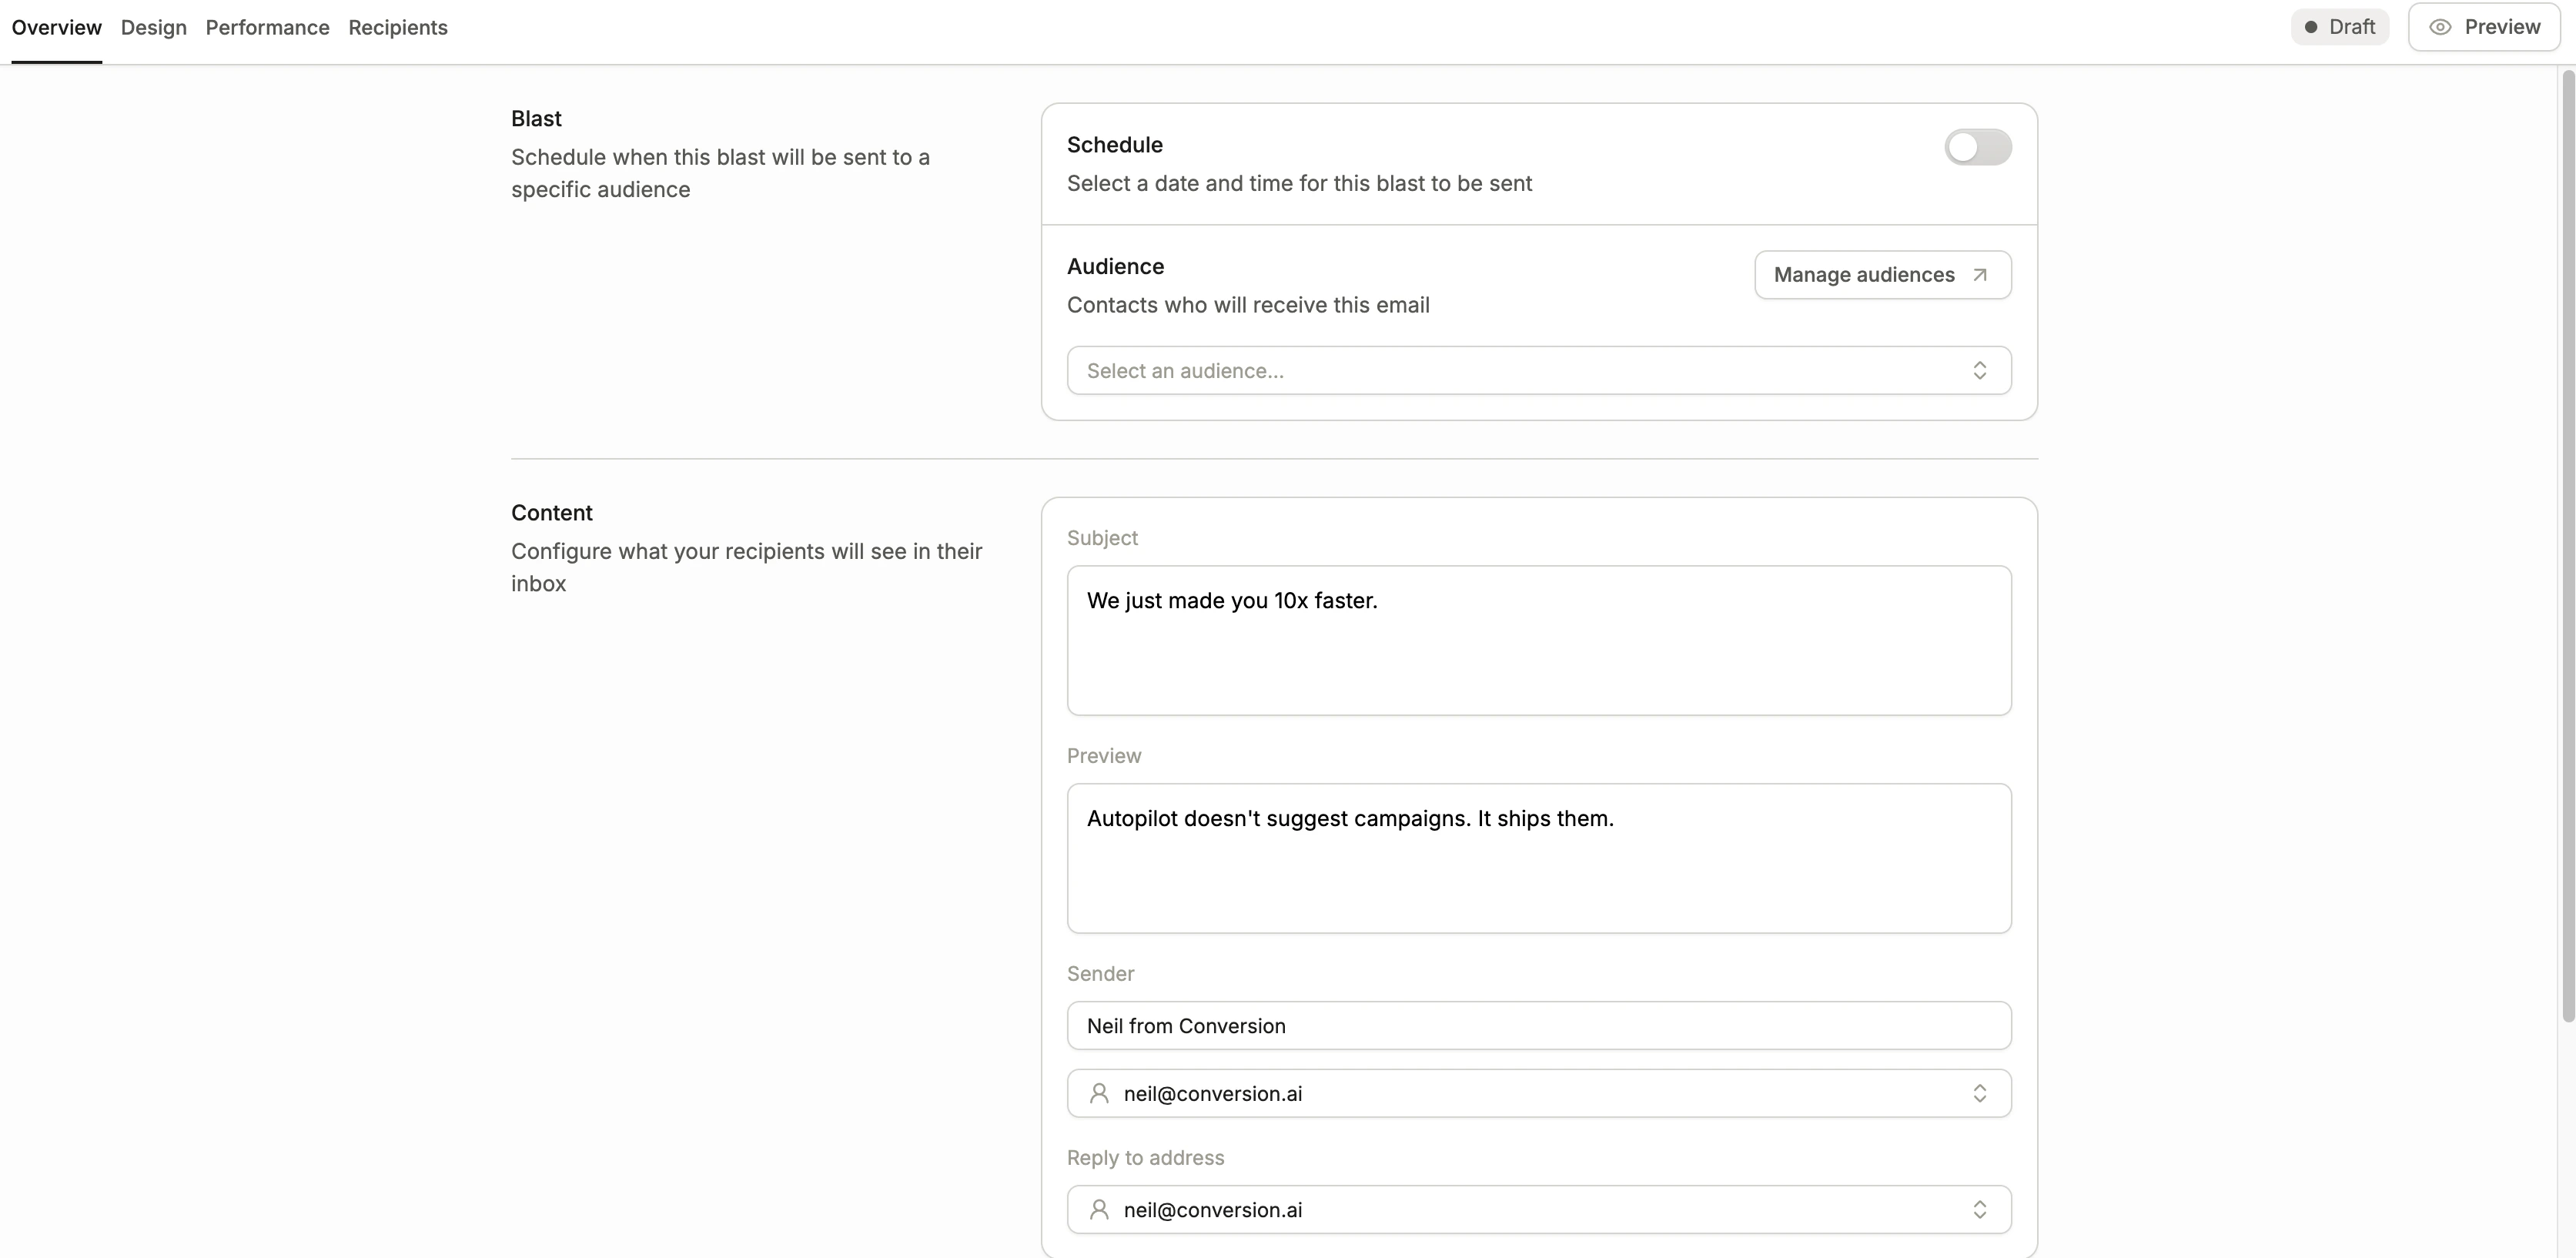
After designing your email, configure the details of the blast. This includes your audience, sender, subject line, and send time.
 ### Delivery overrides
Two optional toggles in the blast settings let you bypass the default sending guardrails. Use them sparingly — they're intended for transactional or time-sensitive sends, not standard marketing emails.
| Toggle | Effect |
| ------------------------------- | ------------------------------------------------------------------------------------------------------------------------------------------------------------------------------------------------------------------------------------------------------------------------------------------- |
| **Set as operational** | Treats the email as operational (non-marketing). Sends to recipients regardless of their global unsubscribe status or topic-level unsubscribes, and also ignores the workspace's [communication limits](/product-docs/workspace-settings/emails-and-domains/overview#communication-limits). |
| **Ignore communication limits** | Ignores only the workspace's daily, weekly, and monthly [communication limits](/product-docs/workspace-settings/emails-and-domains/overview#communication-limits). Unsubscribes and topic unsubscribes are still respected. |
**Set as operational** overrides explicit recipient consent. Only use it for emails that recipients must receive regardless of marketing preferences (e.g. password resets, billing notices, account-critical updates). Misuse can violate regulations like CAN-SPAM and GDPR.
## 4. Send or schedule
Once your settings are configured, you can either send the blast immediately or schedule it for a future date.
When the blast is sent out, the email is only **sent once** to each unique email address in the audience. This means if two contacts in the audience share an email address, the blast is only sent to that email address once.
Before sending, use the **Preview** and **Test send** features in the email builder to make sure your email renders correctly across devices and email clients.
### Delivery overrides
Two optional toggles in the blast settings let you bypass the default sending guardrails. Use them sparingly — they're intended for transactional or time-sensitive sends, not standard marketing emails.
| Toggle | Effect |
| ------------------------------- | ------------------------------------------------------------------------------------------------------------------------------------------------------------------------------------------------------------------------------------------------------------------------------------------- |
| **Set as operational** | Treats the email as operational (non-marketing). Sends to recipients regardless of their global unsubscribe status or topic-level unsubscribes, and also ignores the workspace's [communication limits](/product-docs/workspace-settings/emails-and-domains/overview#communication-limits). |
| **Ignore communication limits** | Ignores only the workspace's daily, weekly, and monthly [communication limits](/product-docs/workspace-settings/emails-and-domains/overview#communication-limits). Unsubscribes and topic unsubscribes are still respected. |
**Set as operational** overrides explicit recipient consent. Only use it for emails that recipients must receive regardless of marketing preferences (e.g. password resets, billing notices, account-critical updates). Misuse can violate regulations like CAN-SPAM and GDPR.
## 4. Send or schedule
Once your settings are configured, you can either send the blast immediately or schedule it for a future date.
When the blast is sent out, the email is only **sent once** to each unique email address in the audience. This means if two contacts in the audience share an email address, the blast is only sent to that email address once.
Before sending, use the **Preview** and **Test send** features in the email builder to make sure your email renders correctly across devices and email clients.