> ## Documentation Index
> Fetch the complete documentation index at: https://docs.conversion.ai/llms.txt
> Use this file to discover all available pages before exploring further.
# Build your first email
> Choose or create an email theme, build a welcome email, preview it for a contact, and prepare it for a workflow.
You will build a short welcome email with a heading, a paragraph, and a button. By the end, you will have a draft you can preview and use in [your first workflow](/product-docs/user-guide/first-workflow).
Before you start, choose a destination URL for the button. To send a test, you also need a [configured sender](/product-docs/workspace-settings/emails-and-domains/senders) and an inbox you control.
## Create the draft
1. In the sidebar, expand **Emails** and open **Workflow emails**.
2. Click **New**. Choose a saved template, or click **Start from scratch** to follow this example.
3. Click the email's name at the top. Enter **User guide - Welcome email**, then click **Confirm and rename**.
Use a workflow email for this guide because the next exercise will send it from a workflow. For a one-time send to a chosen audience, start from **Emails > Blasts** instead. The design steps are the same; the [blast guide](/product-docs/emails/blasts/creating-a-blast) covers recipients and scheduling.
## Set what appears in the inbox
On **Overview**, fill in the email's content settings:
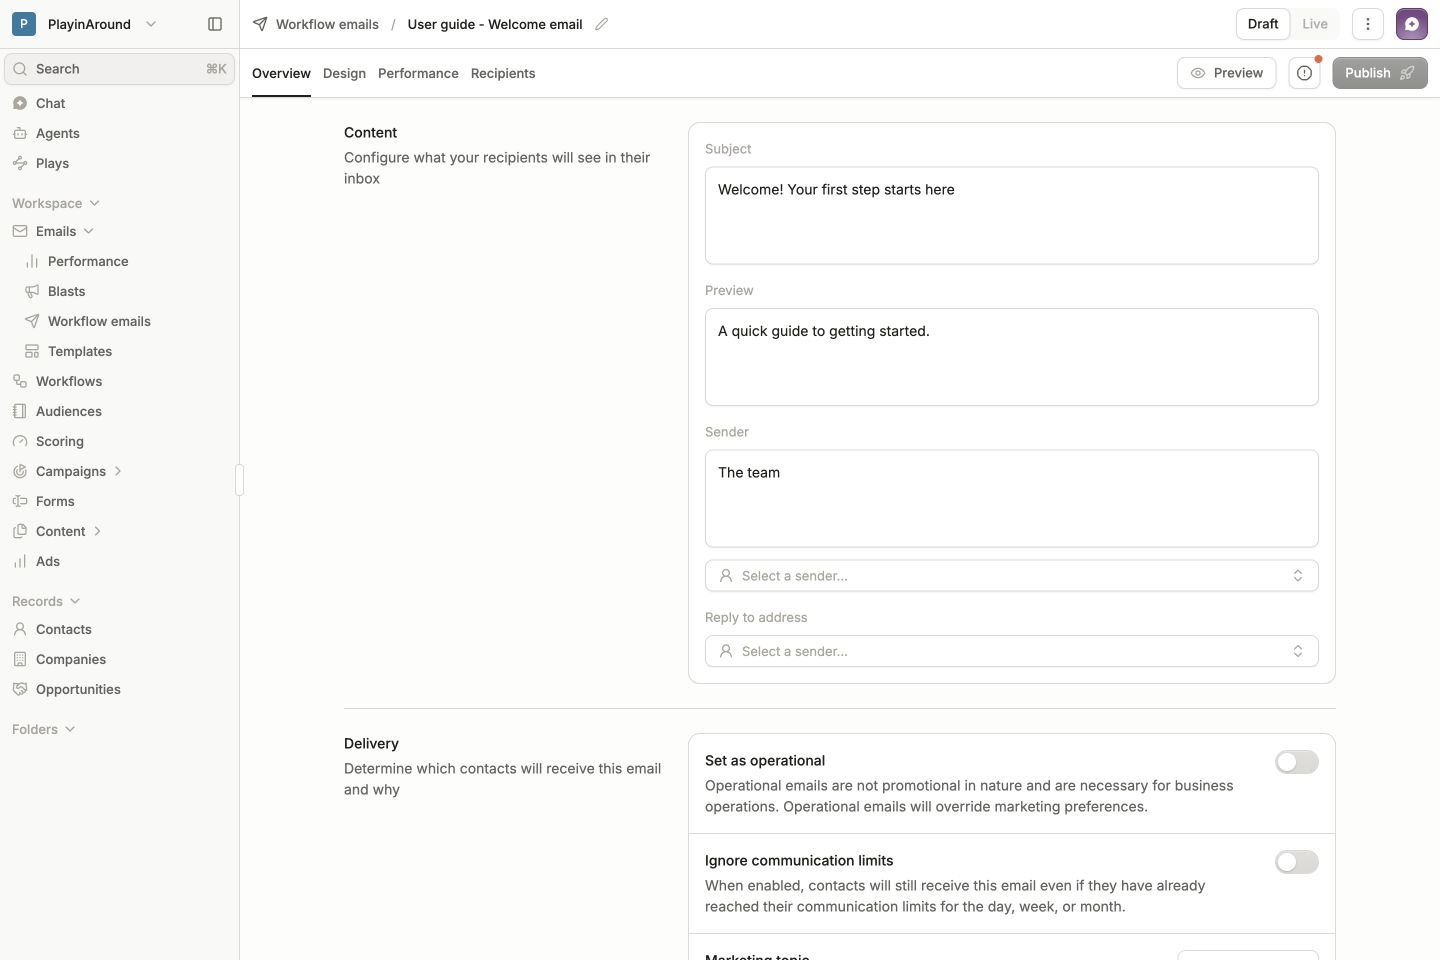 | Field | Example or action |
| - | - |
| **Subject** | `Welcome! Your first step starts here` |
| **Preview** | `A quick guide to getting started.` |
| **Sender** | Enter the display name you want recipients to recognize, then choose a configured sending address. |
| **Reply to address** | Choose the address that should receive replies. |
| **Marketing topic** | Choose the topic that fits the message. |
For this marketing example, leave **Set as operational** and **Ignore communication limits** off. Those settings change how delivery respects marketing preferences and sending limits.
## Choose an email theme
A theme gives the email its colors, fonts, and button styles. New emails use your workspace's default theme. Choose the theme before styling individual blocks so the email starts with a consistent look.
1. Open **Design**. If a block is selected, click **Done** to return to the email's **Settings** panel.
2. Expand **Theme**, then open **Applied theme**.
3. Choose a published theme and check the canvas. If your team already has the right theme, continue to [building the layout](#build-a-simple-layout).
| Field | Example or action |
| - | - |
| **Subject** | `Welcome! Your first step starts here` |
| **Preview** | `A quick guide to getting started.` |
| **Sender** | Enter the display name you want recipients to recognize, then choose a configured sending address. |
| **Reply to address** | Choose the address that should receive replies. |
| **Marketing topic** | Choose the topic that fits the message. |
For this marketing example, leave **Set as operational** and **Ignore communication limits** off. Those settings change how delivery respects marketing preferences and sending limits.
## Choose an email theme
A theme gives the email its colors, fonts, and button styles. New emails use your workspace's default theme. Choose the theme before styling individual blocks so the email starts with a consistent look.
1. Open **Design**. If a block is selected, click **Done** to return to the email's **Settings** panel.
2. Expand **Theme**, then open **Applied theme**.
3. Choose a published theme and check the canvas. If your team already has the right theme, continue to [building the layout](#build-a-simple-layout).
 ### Create a theme from a website or image
Open [Chat beside your email](/product-docs/user-guide/chat#open-chat-from-the-page-you-need-help-with), or open **Chat** from the main sidebar. Give Conversion AI a visual reference and ask it to create a new email theme.
Replace the URL with your website:
> Create a new email theme named Website theme using [https://example.com](https://example.com) as the visual reference. Match the brand colors, typography, links, and buttons, using supported email fonts. Keep it unpublished and leave existing themes and emails unchanged. Tell me which choices you could not confirm from the website.
Use the chat attachment control to upload a screenshot of your website, an existing email, or a brand reference. Then ask:
> Create a new email theme named Brand reference from the attached image. Match its background, text, link, and button colors, and choose the closest supported fonts. Keep it unpublished and leave existing themes and emails unchanged. Explain any details you had to approximate.
### Create a theme from a website or image
Open [Chat beside your email](/product-docs/user-guide/chat#open-chat-from-the-page-you-need-help-with), or open **Chat** from the main sidebar. Give Conversion AI a visual reference and ask it to create a new email theme.
Replace the URL with your website:
> Create a new email theme named Website theme using [https://example.com](https://example.com) as the visual reference. Match the brand colors, typography, links, and buttons, using supported email fonts. Keep it unpublished and leave existing themes and emails unchanged. Tell me which choices you could not confirm from the website.
Use the chat attachment control to upload a screenshot of your website, an existing email, or a brand reference. Then ask:
> Create a new email theme named Brand reference from the attached image. Match its background, text, link, and button colors, and choose the closest supported fonts. Keep it unpublished and leave existing themes and emails unchanged. Explain any details you had to approximate.
 If the website is inaccessible to the AI, attach a screenshot instead. A theme supplies reusable styles; add your logo, illustrations, and email copy in the email builder.
Open the created theme from the response. You can also find it in **Workspace settings → Email themes**.
1. In **Theme**, compare the colors, headings, body text, and buttons with your reference. Check any font substitutions the AI reports.
2. Open **Playground** to see the styles on sample email content. Playground changes are for previewing; edit **Theme** to change the saved styles.
3. Request a specific correction in chat or adjust it in **Theme**. Review and approve proposed edits when prompted.
4. When the theme is ready, click **Publish**. Then return to your email's **Design → Settings → Theme → Applied theme** and select it.
If the website is inaccessible to the AI, attach a screenshot instead. A theme supplies reusable styles; add your logo, illustrations, and email copy in the email builder.
Open the created theme from the response. You can also find it in **Workspace settings → Email themes**.
1. In **Theme**, compare the colors, headings, body text, and buttons with your reference. Check any font substitutions the AI reports.
2. Open **Playground** to see the styles on sample email content. Playground changes are for previewing; edit **Theme** to change the saved styles.
3. Request a specific correction in chat or adjust it in **Theme**. Review and approve proposed edits when prompted.
4. When the theme is ready, click **Publish**. Then return to your email's **Design → Settings → Theme → Applied theme** and select it.
 An unpublished theme will not appear in the email's picker. Publishing a theme makes it available to use; existing emails keep their current theme version until you choose an update. Individual block overrides also remain in place. See [Email themes](/product-docs/emails/themes) for defaults, versions, and section palettes.
## Build a simple layout
Open **Design**. The canvas is your email, the bottom toolbar contains blocks, and the right panel shows settings for the selected block. With no block selected, it shows the email's theme and page settings.
An unpublished theme will not appear in the email's picker. Publishing a theme makes it available to use; existing emails keep their current theme version until you choose an update. Individual block overrides also remain in place. See [Email themes](/product-docs/emails/themes) for defaults, versions, and section palettes.
## Build a simple layout
Open **Design**. The canvas is your email, the bottom toolbar contains blocks, and the right panel shows settings for the selected block. With no block selected, it shows the email's theme and page settings.
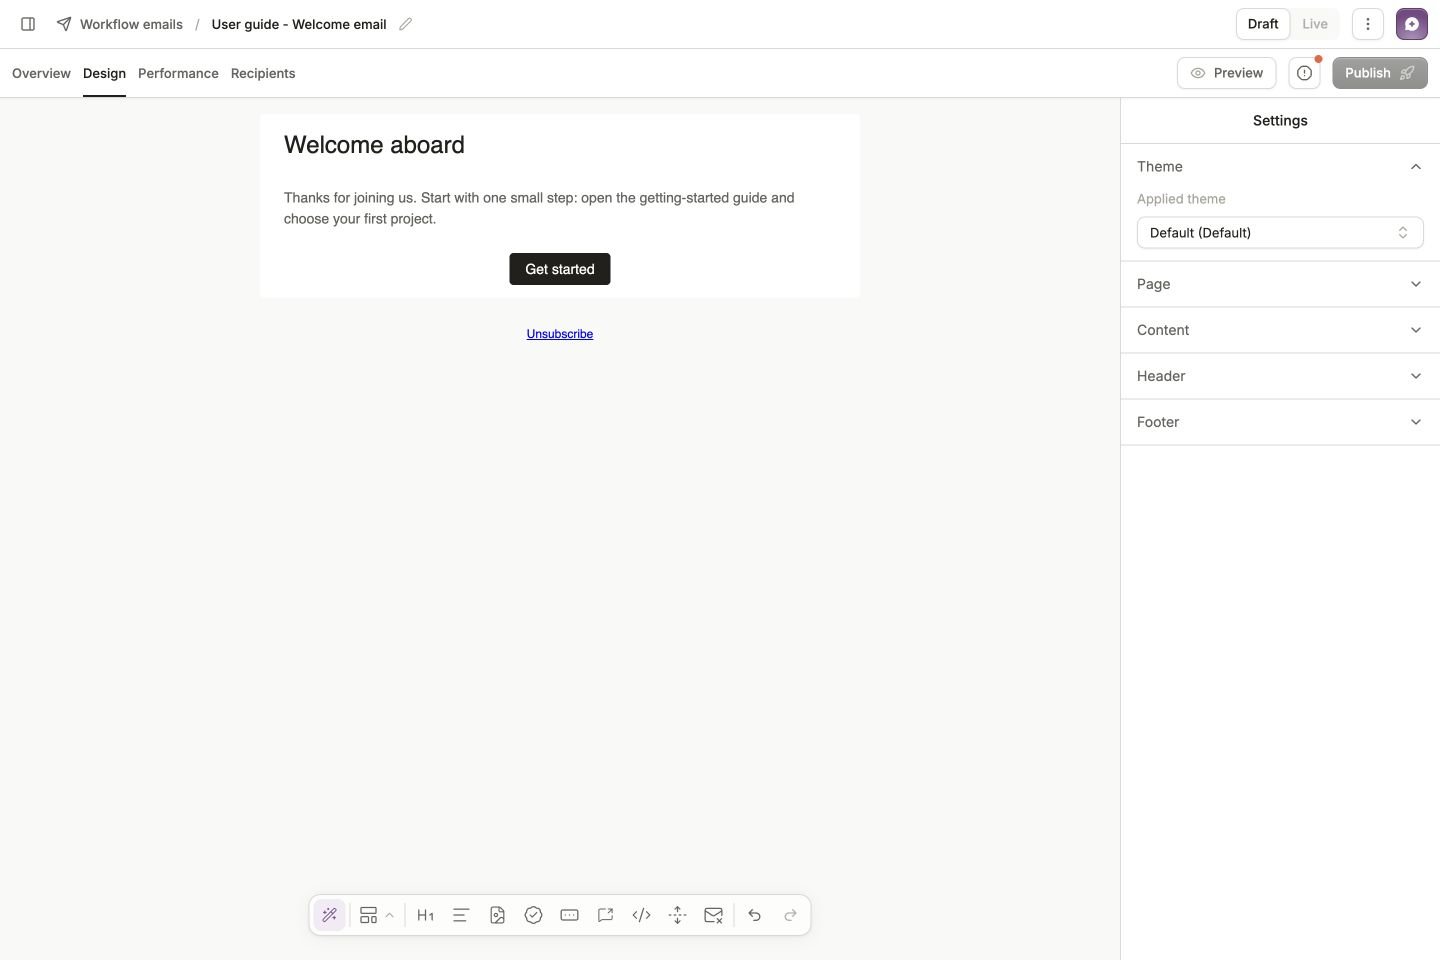 Drag the **Heading** block from the bottom toolbar into **Drag a block here**. Click its text and enter **Welcome aboard**.
Drag a **Text** block below the heading. Write a short paragraph that explains the next step, for example:
> Thanks for joining us. Start with one small step: open the getting-started guide and choose your first project.
Drag a **Button** block below the paragraph. In its right-hand settings, change **Label** to **Get started** and set **Link** to your destination URL.
Use the full URL, including `https://`. The screenshot uses the Conversion docs; use a page that fits your own welcome message.
Drag the **Heading** block from the bottom toolbar into **Drag a block here**. Click its text and enter **Welcome aboard**.
Drag a **Text** block below the heading. Write a short paragraph that explains the next step, for example:
> Thanks for joining us. Start with one small step: open the getting-started guide and choose your first project.
Drag a **Button** block below the paragraph. In its right-hand settings, change **Label** to **Get started** and set **Link** to your destination URL.
Use the full URL, including `https://`. The screenshot uses the Conversion docs; use a page that fits your own welcome message.
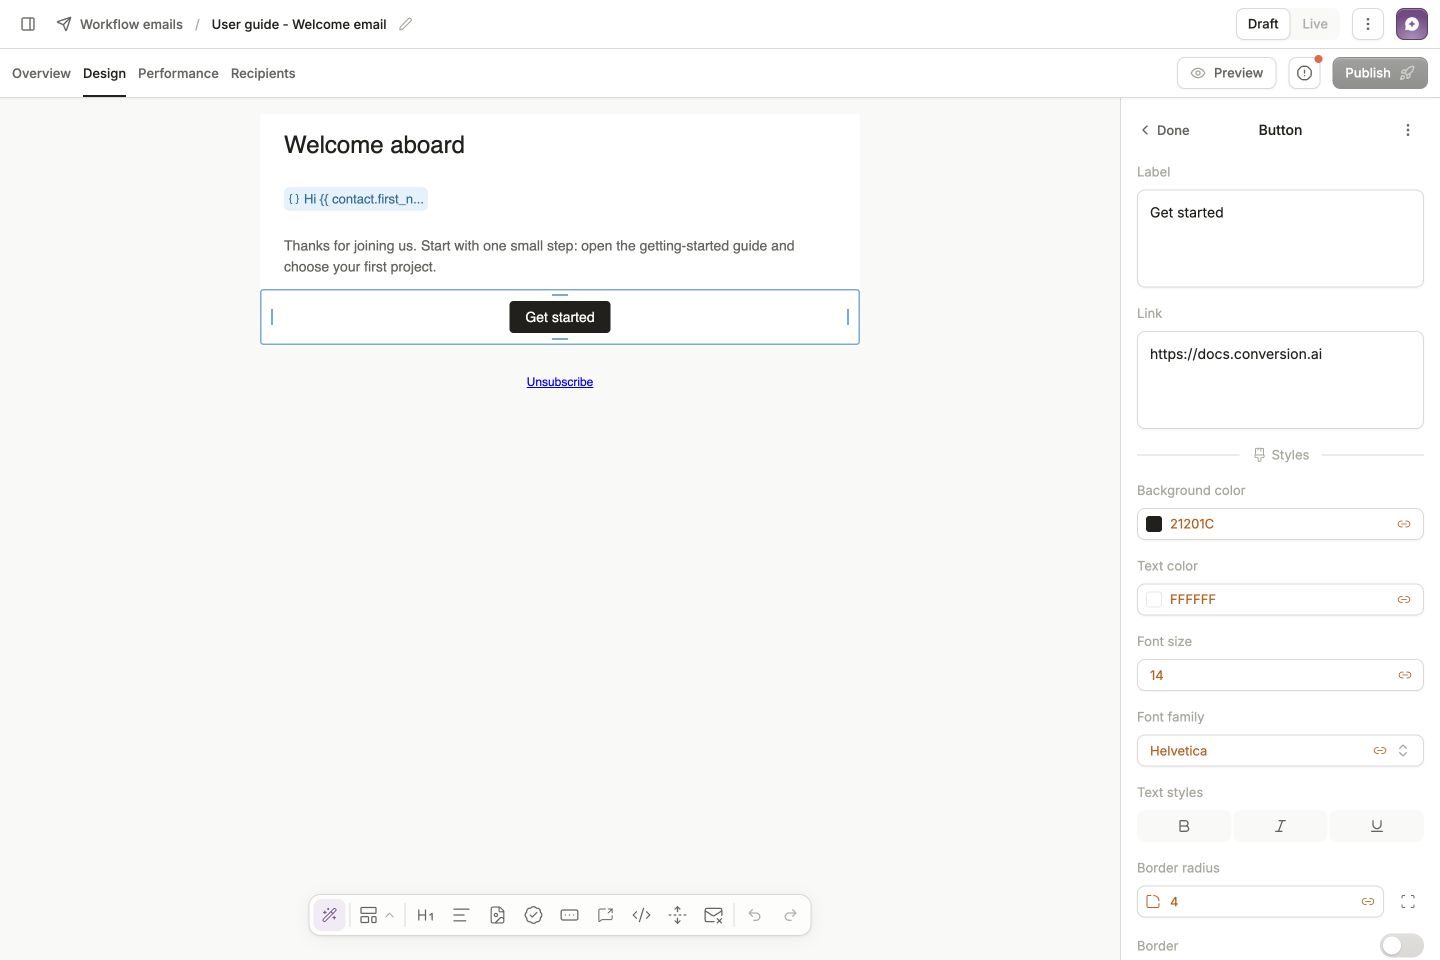 Click **Done** to return to the email settings. Use your team's existing theme when one is available. Check spacing, text size, and button contrast, and keep the unsubscribe link in the footer.
Your draft saves as you work. For other layouts and block types, see the [email block reference](/product-docs/emails/email-builder/blocks).
## Add personalization when you need it
To greet each person by name, follow [Personalize with Liquid](/product-docs/user-guide/liquid). That guide adds a greeting with a fallback, uses AI to generate it, and checks the result against contact data.
You can also finish this email with ordinary text first and add personalization later.
## Preview on desktop and mobile
1. Click **Preview**.
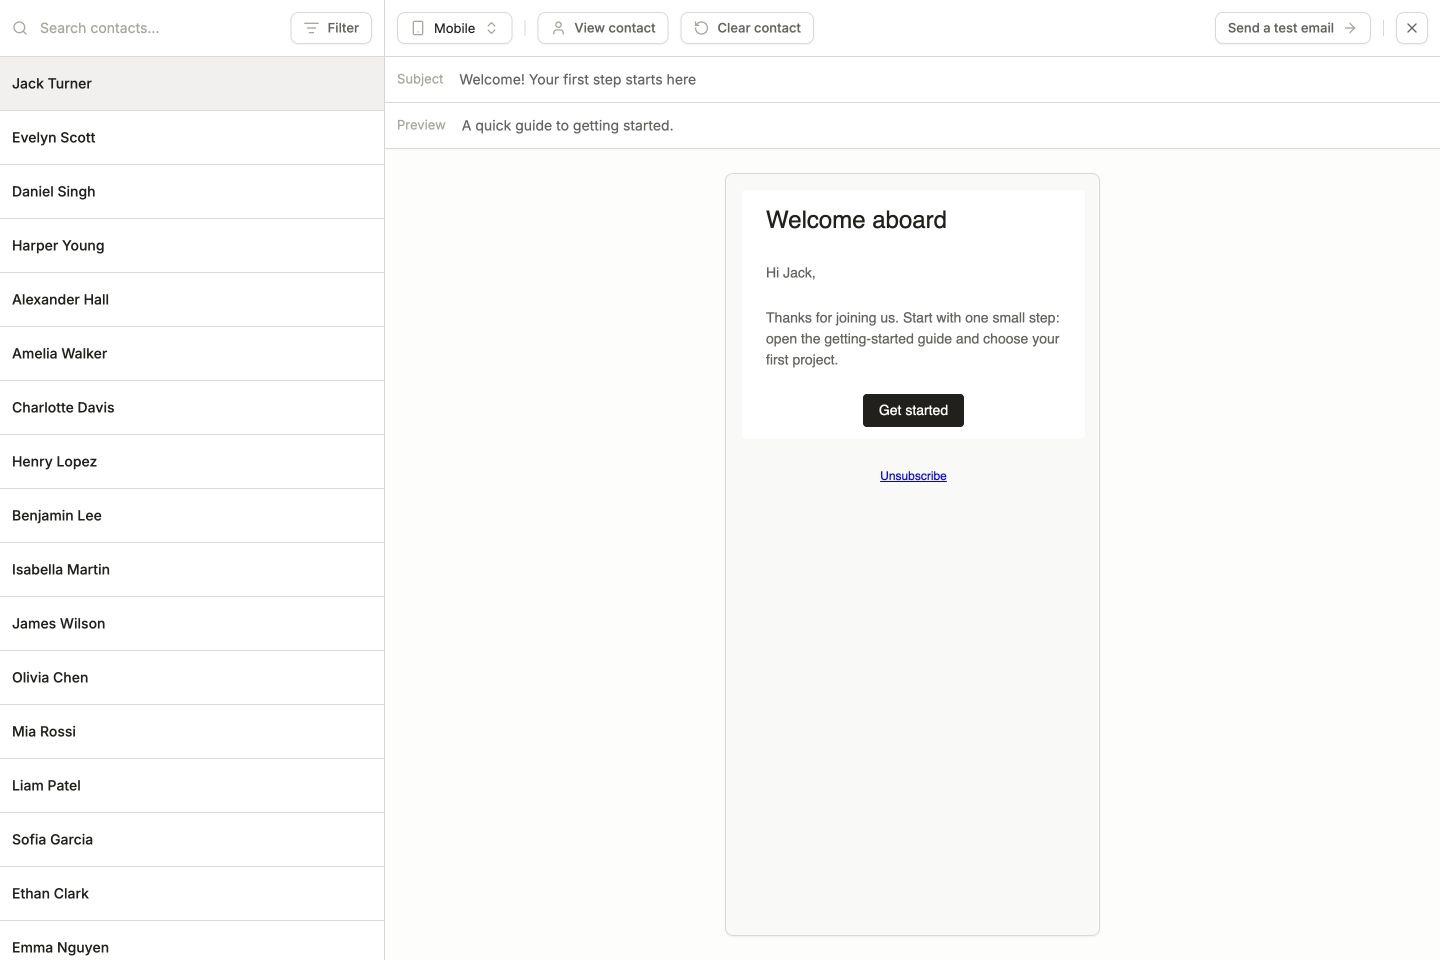
2. Use **Search contacts...** to find your test contact, then select them. The preview renders the subject, preview text, and body using that contact's data.
3. Check **Desktop**, then switch the device dropdown to **Mobile**. Look for awkward wrapping, crowded text, and buttons that are difficult to read.
4. If you used personalization, check another contact too. **Clear contact** lets you inspect the result without a selected contact.
Click **Done** to return to the email settings. Use your team's existing theme when one is available. Check spacing, text size, and button contrast, and keep the unsubscribe link in the footer.
Your draft saves as you work. For other layouts and block types, see the [email block reference](/product-docs/emails/email-builder/blocks).
## Add personalization when you need it
To greet each person by name, follow [Personalize with Liquid](/product-docs/user-guide/liquid). That guide adds a greeting with a fallback, uses AI to generate it, and checks the result against contact data.
You can also finish this email with ordinary text first and add personalization later.
## Preview on desktop and mobile
1. Click **Preview**.
2. Use **Search contacts...** to find your test contact, then select them. The preview renders the subject, preview text, and body using that contact's data.
3. Check **Desktop**, then switch the device dropdown to **Mobile**. Look for awkward wrapping, crowded text, and buttons that are difficult to read.
4. If you used personalization, check another contact too. **Clear contact** lets you inspect the result without a selected contact.
 ## Send yourself a test
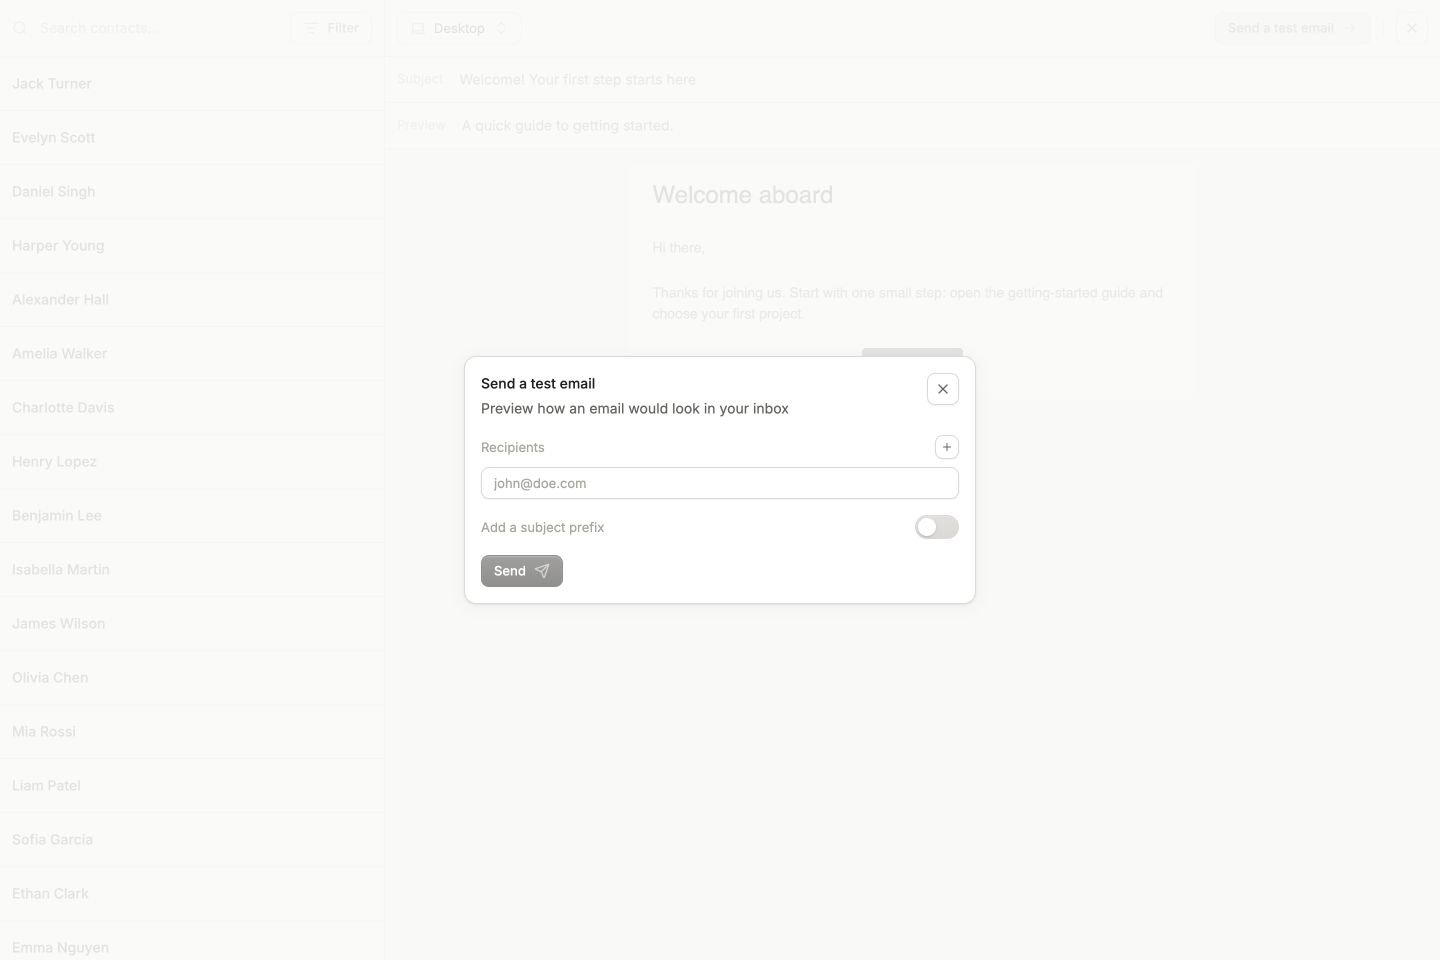
From the preview, click **Send a test email**. Enter your own address under **Recipients**. Optionally enable **Add a subject prefix** so the test is easy to recognize, then click **Send**.
The selected preview contact supplies personalization data. The addresses in **Recipients** receive the test. Selecting a contact in the preview does not send an email to that contact.
## Send yourself a test
From the preview, click **Send a test email**. Enter your own address under **Recipients**. Optionally enable **Add a subject prefix** so the test is easy to recognize, then click **Send**.
The selected preview contact supplies personalization data. The addresses in **Recipients** receive the test. Selecting a contact in the preview does not send an email to that contact.
 In your inbox, check the sender name, subject, greeting, layout, and destination of each link. Return to **Design** to fix anything you find, then preview again.
## Make the email ready for a workflow
Keep working in **Draft** until the email is ready. **Publish** makes the reviewed version available for workflows to use; saving a draft alone does not do that. Publishing a new, unused workflow email does not enroll contacts or start a workflow.
If **Publish** is unavailable, open the issue indicator beside it and resolve the listed problems, such as an incomplete sender or invalid content.
When you later edit an email already used by an active workflow, publishing updates the version that workflow can send. Review changes with the same care as the first version.
You are ready for [your first workflow](/product-docs/user-guide/first-workflow) when the email looks right, the sender and links are correct, and the version you want to send is published. You can also build a paused workflow while finishing these checks.
In your inbox, check the sender name, subject, greeting, layout, and destination of each link. Return to **Design** to fix anything you find, then preview again.
## Make the email ready for a workflow
Keep working in **Draft** until the email is ready. **Publish** makes the reviewed version available for workflows to use; saving a draft alone does not do that. Publishing a new, unused workflow email does not enroll contacts or start a workflow.
If **Publish** is unavailable, open the issue indicator beside it and resolve the listed problems, such as an incomplete sender or invalid content.
When you later edit an email already used by an active workflow, publishing updates the version that workflow can send. Review changes with the same care as the first version.
You are ready for [your first workflow](/product-docs/user-guide/first-workflow) when the email looks right, the sender and links are correct, and the version you want to send is published. You can also build a paused workflow while finishing these checks.