

1. Choose a starting point
You’ll first be prompted to choose how to start building your email.- My templates
- Curated
- Start from scratch
Start from a template your team has saved in Conversion. This is useful for emails you send regularly and want to keep consistent.
2. Build your email
Once you’ve chosen a starting point, you’ll be taken into the Email Builder to design your email.3. Configure your blast settings
After designing your email, configure the details of the blast. This includes your audience, sender, subject line, and send time.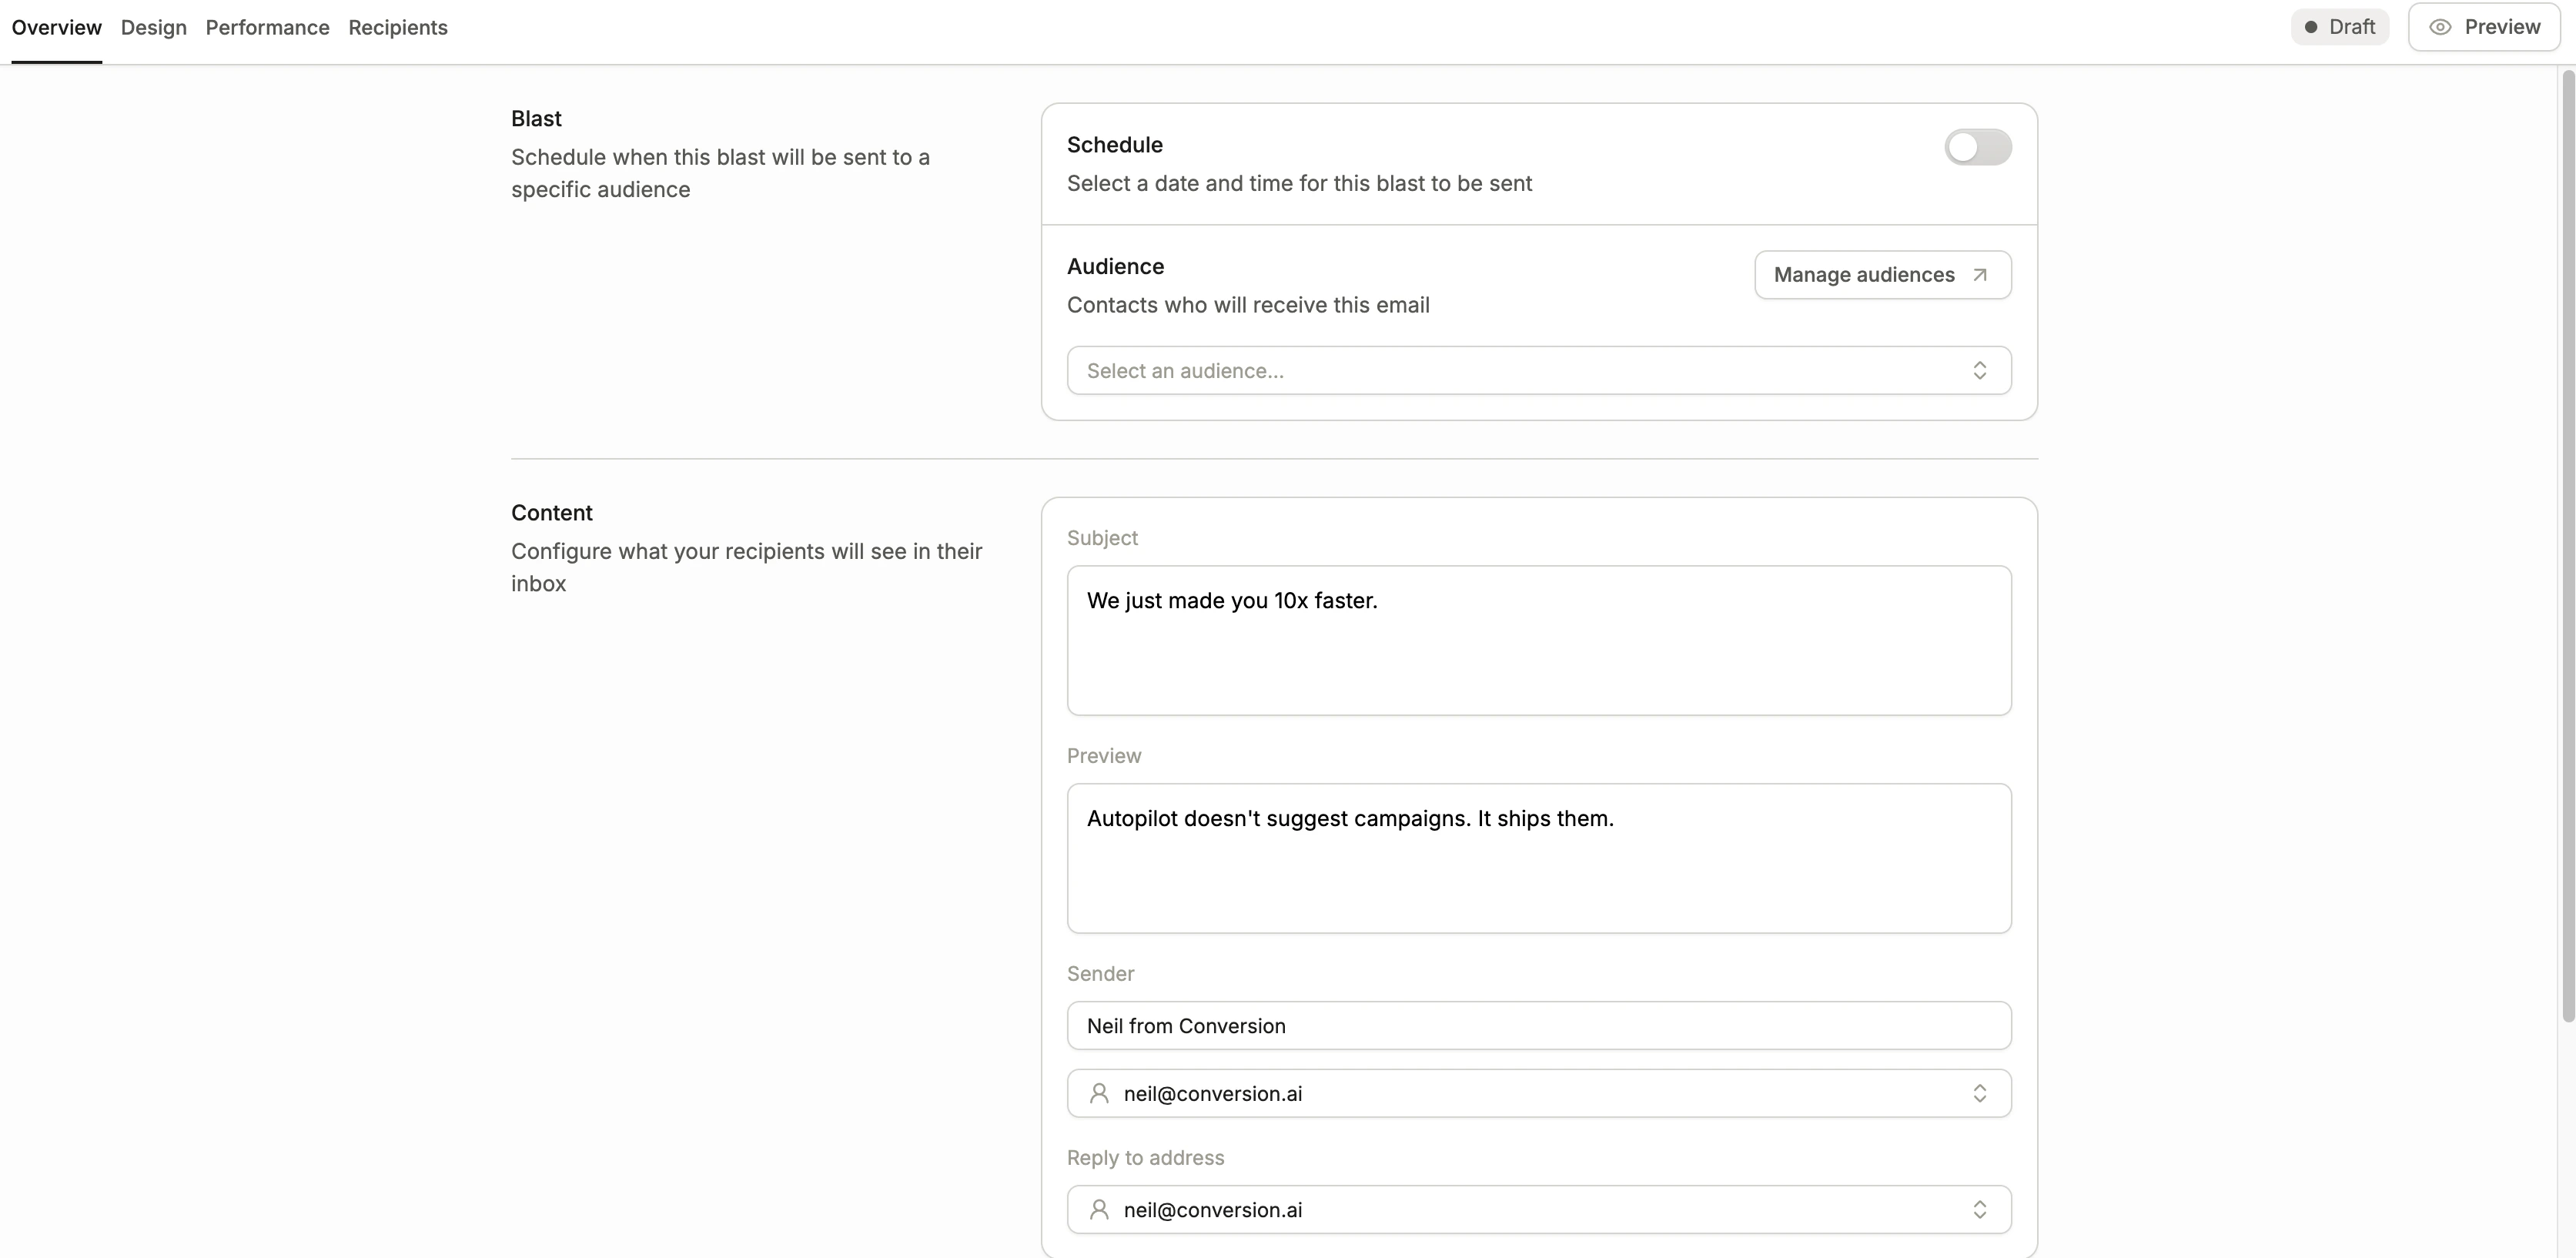
Blast settings
Delivery overrides
Two optional toggles in the blast settings let you bypass the default sending guardrails. Use them sparingly — they’re intended for transactional or time-sensitive sends, not standard marketing emails.4. Send or schedule
Once your settings are configured, you can either send the blast immediately or schedule it for a future date.The scheduled date and time use your computer’s timezone. For example, if your computer is set to Pacific Time and you pick 9:00 AM, the blast sends at 9:00 AM Pacific (12:00 PM Eastern).